Using Automation Templates
Templates are ready-made automations you can install in seconds — the fastest way to see a real run. StackJack ships a set of curated templates, and your team (or the wider community, once published…
Written By Christopher Scaminaci
Last updated 6 days ago
Templates are ready-made automations you can install in seconds — the fastest way to see a real run. StackJack ships a set of curated templates, and your team (or the wider community, once published and approved) can add more. Installing a template creates a normal automation in your tenant that you can then edit, test, and promote like any other.
Browse the gallery
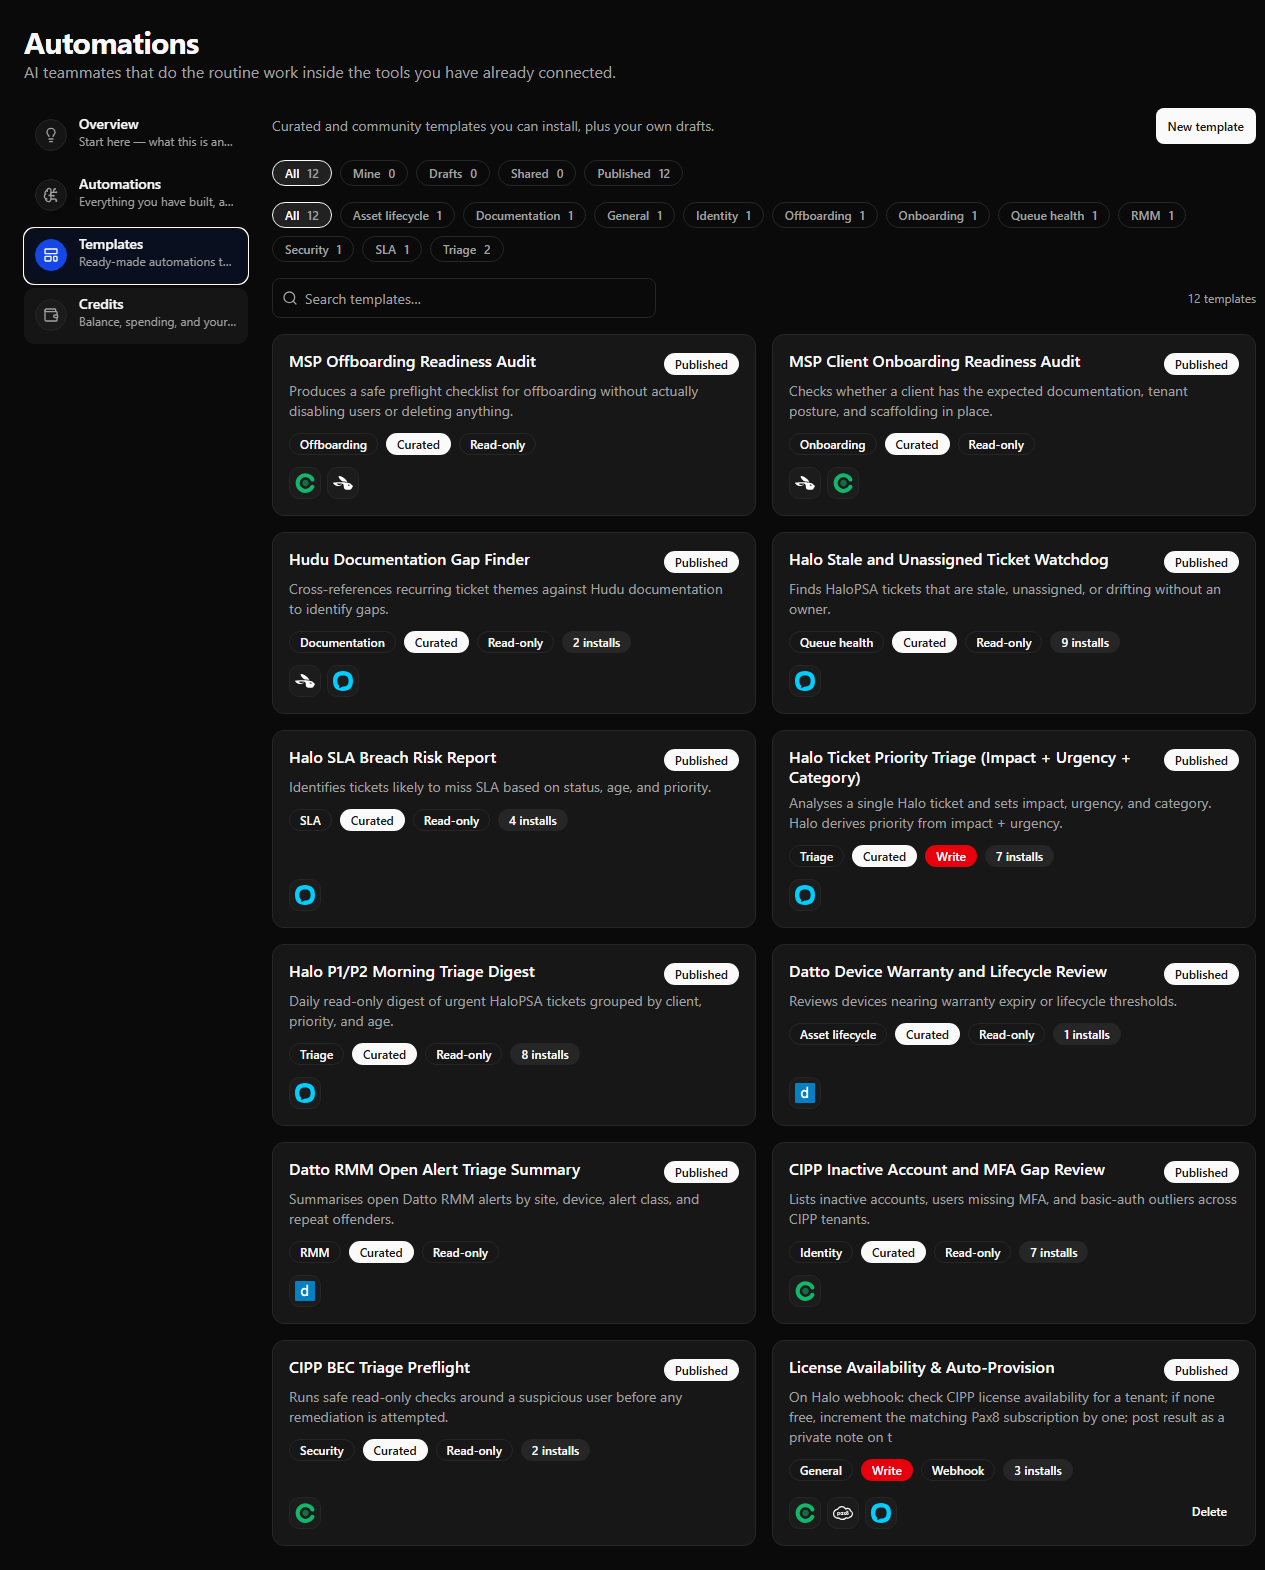
Open the Templates tab on the Automations page. New template (top right) starts one from scratch — see Publishing Your Own Templates.
- A visibility facet row filters by where a template lives: All, Mine (templates you authored), Drafts (your private templates), Shared (shared across your tenant), and Published (on the marketplace). Every chip shows a live count.
- A category row filters by category; All is the default, and every chip shows a live count. The two rows compose.
- Each template card shows the name, a one-line summary, its category, a strip of connector icons for the tools it uses (up to five, with any extras collapsed into a +N chip), and a set of status badges:
Templates you own show a Delete action on the card. Despite the label, this archives the template rather than hard-deleting its stored record; it disappears from the active gallery and cannot be newly installed. Existing automations installed from it are unaffected. Click a card to open the template's detail page.
The template detail page
The detail page tells you everything before you commit:
- Header — name, summary, category, Curated or Community, a visibility badge (for your tenant's own templates: Private draft, Shared with tenant, Pending review, Published, Rejected, or Archived), and badges for the connectors the template supports.
- Overview — the long description and any setup notes from the author.
- Required tools — the tools the installed automation will need, plus any recommended optional tools.
- Parameters — a table of the placeholders you will fill in at install time: name, type, whether required, and the default or sample value.
- System prompt template — the raw prompt with its
{{parameter}}placeholders, substituted at install time.
Actions: Install is always available. If the template belongs to your tenant, you also get Edit draft and Publish review — see Publishing Your Own Templates.
Install a template
Installing is a short guided series of steps. You move through them with Back and Next, and each step only lets you continue once it's satisfied — so a problem becomes a step to complete rather than a failure at the end.
- Click Install on the template's detail page.
- Prerequisites — a quick read-out of the connectors this template can use and whether your workspace has each one enabled. Anything missing shows an Enable connector button that takes you to your connectors. This step is informational: you can keep going and enable the connector later, but tools that need it won't run until you do.
- Credential — the installed automation initially calls tools using the workspace owner's connector credentials. There is nothing to select during installation; after installing, open the builder to choose a specific member under Run as if the automation should use that member's connector access instead.
- Configure — the agent name and description (pre-filled from the template; adjust if you like — a duplicate name is automatically suffixed, for example "Ticket Triage (2)") plus one input per template parameter. Required parameters are marked with
*; safe defaults and samples are pre-filled where the author provided them. Inputs match the parameter type: plain text, multi-line text, or a dropdown of allowed values. - Field paths (only for some webhook templates) — if the template is triggered by a webhook and reads specific fields from the incoming payload but didn't ship those field paths, this step appears so you can supply them. Add the JSON paths to read (for example
$.ticket.id), or tick Pass the whole webhook body to hand the automation the entire payload instead. For every other template this step is greyed out and skipped. If the template also ships a smart filter on its webhook trigger, it installs with the template and is checked at install time like any other setting: a template whose filter cannot be validated — for example one that would land on an automation that discards the body — is refused with a message naming the reason, rather than installing an automation that would not save. - Review & install — the tools the automation will get (required tools are pre-checked and can't be unticked; recommended tools are optional), plus the safety controls:
- Dry run mode is checked by default. Read-only calls still use live connector data, while write and destructive connector calls are simulated before reaching the connector. The one exception is a destructive call you approve yourself in a supervised test run, which executes for real against your live systems — see Approving a supervised test call. Leave it on for the first runs.
- A Curated template — one StackJack publishes — can set its own starting value here, so a curated template whose whole job is to write may open with the box already unchecked. When that happens the step says so in plain words, and you can still tick the box before installing (bear in mind that re-arming dry run can block the tools that template needs). Every other template starts checked, including your own drafts, templates shared inside your workspace, and community templates from other MSPs — whatever their author chose.
- The consent acknowledgement: "I understand this agent will run autonomously against my production MSP tools and take actions on my behalf. I am responsible for reviewing the system prompt and the tool list before activating it." The Install button stays disabled until you accept it and at least one tool is selected — the step tells you which is missing.
Click Install template. The automation is created and you land in its Advanced Builder, where you can review the substituted system prompt and configuration before running it.
All the standard automation guardrails apply to installed templates: the tool list is validated against your plan and connector subscriptions, dry-run write-blocking applies until you promote, and the automation cannot run without consent.
If something goes wrong
Most install problems are now handled inside the stepper before you reach the end:
- A webhook template that reads specific fields but didn't list them used to be a dead-end. Now the Field paths step catches it and lets you add the paths (or pass the whole body) right there, so the install completes.
- A missing connector is surfaced up front on the Prerequisites step with a link to enable it, instead of failing silently later.
- Missing consent or no tools selected keeps the Install button disabled with a message naming what's left, rather than erroring on click.
If an install still fails, the Review step shows a plain-language reason with a Support code you can expand for support. The ones you're most likely to see, and what they mean:
- The template can't be installed as-is — its trigger or payload configuration is invalid. If it's your own template, open Edit draft and fix the webhook fields (or payload mode), then re-save; for a curated or community template, contact StackJack support.
- You don't have access to install this template — confirm it's still curated, published, or owned by you.
- Template not found — refresh the gallery; it may have been unpublished or archived.
- The service is temporarily unavailable, or the AI provider rejected the new automation — retry in a moment, and if it persists, contact support (include the support code shown).
Templates you save from one of your own automations are sanitized so they install cleanly, and the Field paths step repairs the older webhook templates that predate that sanitizing — so the webhook-fields problem no longer requires a support ticket.
An empty gallery right after the feature was enabled usually just needs a refresh — built-in templates are seeded when the automation service starts.
Still need help? Ask the team