Connecting a Connector
This chapter walks through the generic connect flow on the Connectors page. Every connector follows the same three steps — only the credential fields differ. The exact vendor-side steps for each…
Written By Christopher Scaminaci
Last updated 6 days ago
This chapter walks through the generic connect flow on the Connectors page. Every connector follows the same three steps — only the credential fields differ. The exact vendor-side steps for each product (where to click in HaloPSA, NinjaOne, IT Glue, and so on) live in the per-connector setup guides in this section, and the same steps are always available in-app.
The Connectors page
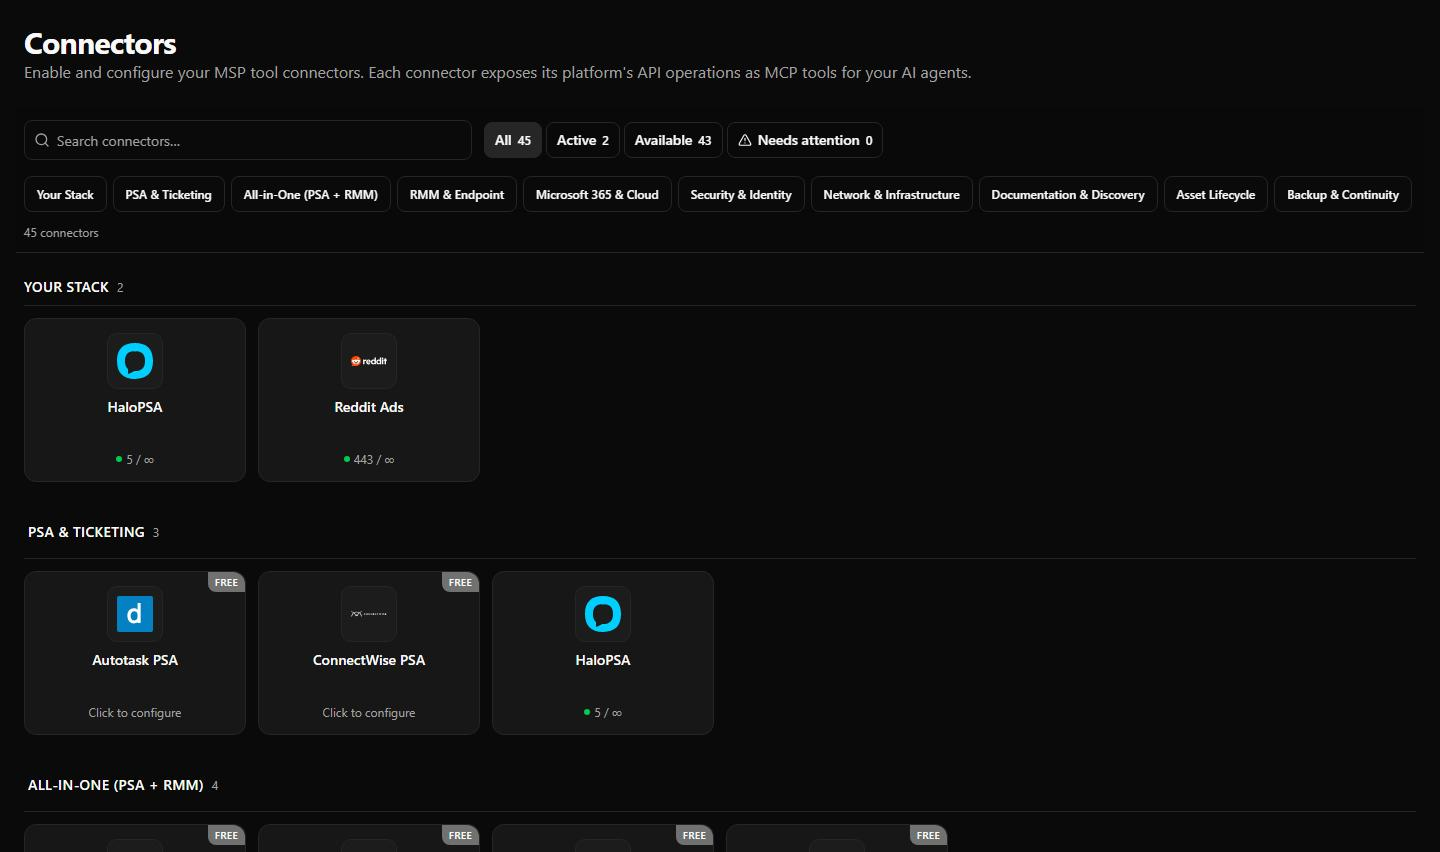
Open Connectors in the sidebar. You'll see one card per connector, each showing:
- Status badge — Connected (green dot) or Not Configured.
- Validity badge — Valid, Invalid, or Disabled. A Disabled badge carries a keyboard-accessible "Why?" tooltip, and Invalid/Disabled cards expand a full explanation below the badge (see Connector Health & Auto-Disable).
- Instance URL — which vendor instance the connector points at.
- Plan badge and usage bar — your tier and where you are in the current billing cycle.
- Action buttons — How To Connect, Configure (or Update once connected), Disconnect, and recovery buttons when something is wrong.
Step 1 — Read the setup guide
Click How To Connect on the connector's card. The setup guide walks you through creating the credential in the vendor product:
- Numbered steps with links to the vendor's own documentation.
- Warning callouts for common traps (for example, secrets that are only shown once at creation).
- A permission summary showing what access the credential you create will grant to StackJack — useful for least-privilege reviews before you generate a key.
Step 2 — Configure
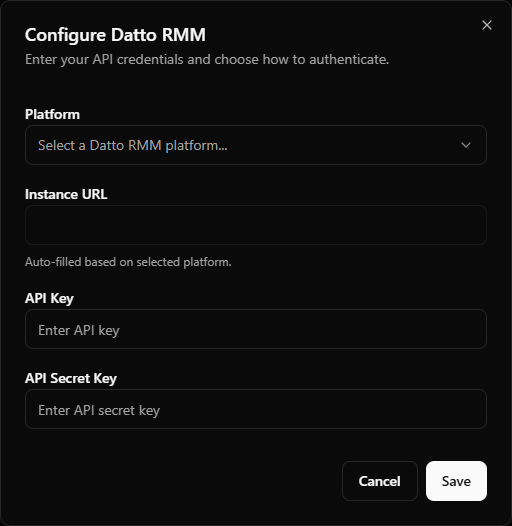
Click Configure to open the credential dialog. What you see depends on the connector, but the building blocks are consistent:
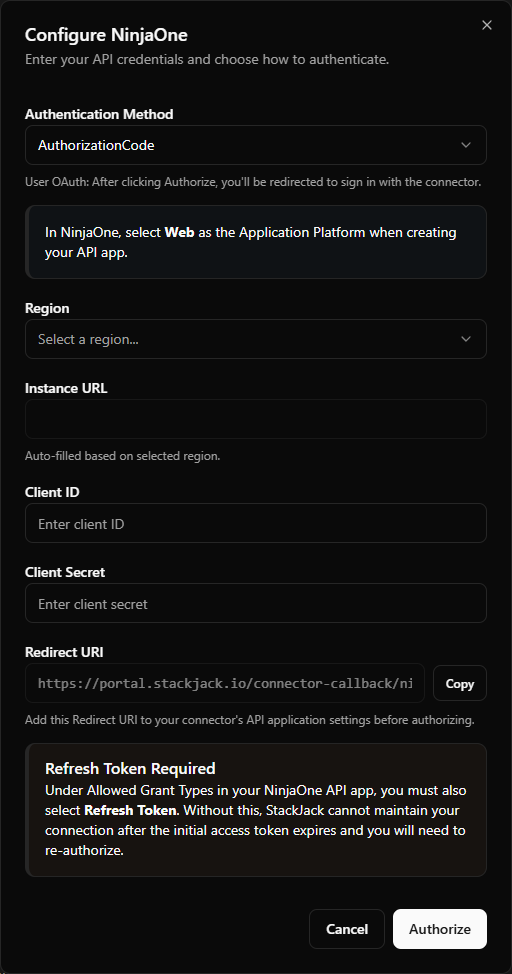
- Authentication method choice — HaloPSA and NinjaOne carry the Authentication Method selector: Authorization Code (User OAuth) — Recommended or Client Credentials. Two other connectors offer a choice of their own rather than through that selector. ImmyBot asks you to pick between a personal access token created inside ImmyBot and a Microsoft Entra app registration. Both are credentials you paste, not a sign-in: the Entra option authenticates app-only, so nobody signs in. Microsoft Azure and Microsoft Graph connect by signing in with Microsoft, and offer Advanced — use your own app registration if you would rather consent to an application you own. Every other connector uses a fixed method and shows no choice.
- Signing in instead of pasting a key. Four connectors are set up by signing in rather than by entering a credential: HaloPSA and NinjaOne in OAuth mode, and Microsoft Azure and Microsoft Graph always. Reddit Ads is a fifth OAuth connector, authorized once for the whole organization by an administrator. What each of those means for who on your team can use the connection is in Who can use which identity.
- Region or platform dropdown — connectors with regional endpoints (for example NinjaOne, IT Glue, Datto RMM, Action1, ConnectWise PSA, Liongard) let you pick your region, which fills in a read-only instance URL for you.
- Fixed-URL connectors — some connectors (Kaseya Quote Manager, ConnectWise Sell, Telivy, Addigy, Huntress, and Pax8) have a single global API endpoint; the URL is displayed as text and there's nothing to enter.
- Credential fields — the API keys, secrets, usernames, or tokens the setup guide told you to create.
- OAuth mode (HaloPSA / NinjaOne) — the dialog shows a copyable Redirect URI. You must register this URI in the vendor's OAuth application before authorizing, or the sign-in will fail. Microsoft Azure and Microsoft Graph need no redirect URI from you, because they use StackJack's own registered application unless you supply your own.
Connectors that need a second, integration-level value: Autotask asks for an API integration code alongside its API-only user, and both values go in the same dialog. ConnectWise PSA and ConnectWise Automate: StackJack connects with its own ConnectWise client ID, so you enter only your tenant credentials. If your company already uses its own client ID for this integration, you can enter it under Advanced. See Connect ConnectWise PSA, Connect ConnectWise Automate, and Connect Autotask PSA.
Autotask has no URL or region field. StackJack discovers your Autotask datacenter zone from the API username when you save; if that discovery fails, the save is aborted rather than storing a credential that points nowhere. See Validation at Save.
When you re-open the dialog for an already-connected card, the instance URL, region, and method are pre-filled — but secrets are never shown again. Leave a secret field untouched only where the dialog explicitly says the stored value will be kept; otherwise enter the value again.
Step 3 — Save (or Authorize)
- For most connectors the footer button is Save: StackJack stores your credentials in Azure Key Vault, activates a Free plan if this is the first save, and immediately test-drives the credentials against the vendor API. See Validation at Save for what the outcomes mean.
- In OAuth mode the button is Authorize: you're redirected to the vendor's own sign-in page to approve access, then returned to StackJack. StackJack completes the connection only if the vendor grants a refresh token (so the connection keeps working unattended) — if the vendor app is missing its offline/refresh-token setting, you'll get a specific error telling you what to fix.
Handy extras
- Deep link:
/connectors?configure=<ConnectorType>opens the configure dialog for that connector directly — the first-login setup wizard uses this to drop you exactly where you need to be. - Page tour: the Connectors page has a built-in guided tour highlighting the card grid and the How To Connect button (restart it any time from the tour button).
Still need help? Ask the team